Saturday, November 29, 2014

Working with Silk


I have a lot of experience working with silk; it's one of my fabrics of choice when I'm putting together a crazy quilt. That said, I generally work with very small pieces of silk, so I was intrigued by a workshop offered by my guild and taught by Cheryl Lynch.

While I generally like to choose my own fabrics, timing made it more convenient to purchase one of
Cheryl's kits. It isn't easy to find silk dupioni in local quilt shops. My plan was to try out one of Cheryl's special curved rulers and to make this small quilt, which is the perfect size for a table runner.

I was so pleased with this ruler that I had to buy one. I can see many uses for it from curved borders to lattice-topped quilts.

There is no curved piecing at all. After sewing together strips of fabric, you use the ruler to cut curved strips which are then appliqued on using a decorative stitch.

While the color scheme matches absolutely nothing in my house, it will look at home in Longboat Key. Visit Cheryl's site  for more information on "curvalicious." 
Thursday, October 16, 2014

Slow, but Steady, Wins the (UFO) Race

Now that the quilt show season is drawing to a close and I have "retired" my latest 3 crazy pieces from the circuit, it's time to assess my progress relative to finishing a number of UFO's.


  • Fabric portrait of Molly Bloom
After a frustrating afternoon of finding the right match of needle and machine settings to accommodate the monofilament thread, I'm pleased with the progress I've made. I spend no more than an hour at a time sewing down each individual piece of fabric that comprises this portrait. Today I worked on the right eye and nose. It's amazing how just this bit of functional sewing affects the overall portrait. I can't wait to begin the thread painting.


  • Black and White "Wonky" Quilt
I finally put the finishing touches on the third crazy quilted circle. I have the backing for this piece and am ready to sandwich and quilt it before appliquing the spheres onto the quilt. I have decided to use a medium grey Aurifil thread to do organic quilting. First, however, I will do some quilting in the ditch to stabilize the piece.


  • The Peacock Quilt
This top has been done for well over a year. The reason it hasn't been finished is my fear of quilting it. I tried to have it done by a longarm quilter, but the minute I mentioned the beading, she did not want to touch it. This is not the kind of beading you could do AFTER the quilt was made. I designed the four corner blocks and each of these took approximately 10 hours to bead. I don't even  want to know how many hours it took for me to apply the sequins. After much deliberating, I've decided to hand quilt this piece myself using perle cotton and "big stitch" quilting. The backing is ready to be pieced, but I'm waiting until after a workshop I'm taking in February to begin the quilting.


  • Cathedral Window Quilt
I've made cathedral window pillows and wall hangings in the past, but never a quilt or large wall hanging. After learning how to make the background squares by machine, I decided to make a king-sized scrappy cathedral window quilt. To that end, I purchased 4 bolts of white Kona cotton. Then reason set in. My cat LOVES to lie on my quilts. White quilt--cat lying on quilt. I decided instead to make a good-sized wall hanging and to use, instead of scrappy windows, a rainbow effect. I used graph paper to design the layout of the quilt. While I know how to join the blocks and sew down the windows by machine (in fact, I'm teaching a workshop on this technique soon), I personally prefer to join the blocks by whipstitching them by hand and to sew down the windows by hand as well. I have over 150 squares completed and decided to start joining them and adding the windows.


The only major UFO not mentioned here is my postage stamp quilt. It is king-sized and is over 90% done, but for some reason I can't seem to get back to it. I'm hoping as I finish some of these and it gets uncovered on the "pile," that that will change.

Tuesday, September 30, 2014

The Quilt Show "Circuit"


I entered my first quilt show in 2010 at the suggestion of guild friends. At that time I was still relatively new to machine quilting, but I'd somehow managed to complete a king sized and a queen sized quilt. I did not even think about attempting to quilt them myself; rather, I sent them to a longarmer who'd been recommended by my local quilt shop. Imagine my surprise when I won two ribbons! One quilt received second place and the other an honorable mention. The judge's comments were tremendously helpful in terms of what I'd done well and what I needed to do to improve. I took my ribbons home and put my quilts on the bed and thought no more about it.

Flash forward to 2012. This is when I discovered that many of my guild friends entered the same quilts in several shows before "retiring" them. I decided to enter two of my quilts into more than one show and accrued several more ribbons, though not for the same quilt.

This spring, I entered 3 quilts into my guild's show and was thrilled to receive a first place ribbon and a NQA ribbon for one and a third place for another. This past weekend I entered the same 3 quilts into another local show and received a first place ribbon (for the same quilt I'd previously received a first for), a third place ribbon (for the same quilt I'd previously received a third for), and an honorable mention for the third quilt. I was over the moon.

Next week I'm entering two of those quilts (the first place and honorable mention) into another local show before "retiring" them to my walls. Fingers crossed.

I'm sure there will be many more quilts that I enter that will not be acknowledged with a ribbon, but I'm suggesting that if you don't already do so, that you enter your quilts as well. First of all, we wouldn't have shows to attend if quilters didn't take the risk of putting their work out there. Second, the judges' feedback is very helpful. Third, it's a wonderful feeling to hear others "oohing" and "ahhing" over your work. You'll never know unless you try.

Wednesday, August 20, 2014

Online Crazy Quilt Class

While I haven't posted in a while, I've been busy working to complete the online crazy quilt class while keeping up with my (many) other projects. Yesterday I took an art quilt class with Leni Wiener. Unfortunately, I didn't have enough of the fabric that I needed--hard to believe--but a trip to my local quilt shop tomorrow will take care of that. I've made good progress beading my crazy circles and will soon be ready to applique those on to my black and white wall hanging.

So here are some shots of the block that I've embellished using templates and a hoop, the primary reason I signed up for this class.


Tuesday, July 29, 2014

UFO Day at the Guild


All quilters have UFO's (unfinished objects) or WIP's (works in progress). I jokingly refer to my habit of working on multiple projects at a time as QADHD (Quilter's Attention Deficit with Hyperactivity Disorder). To my credit, I do eventually finish each project and I don't tire of a project easily since I jump from one to the other.

At today's UFO day I worked on laying down some beaded embroidery stitches on my red crazy circles.  I anticipated getting a lot more done, but there was lots of news to share today and I did at least as much talking as I did stitching. A wonderful reference for beading are Nancy Eha's books-- Bead Creative Like Crazy and Bead Creative Art Quilts. Click here for Nancy's site. I've taken several classes with Nancy and she is an excellent teacher

I thought I would sketch out a plan, but scratched that after a few minutes and decided to begin by beading the 5-sided patch in each circle first before deciding where to go from there. It's been a few months since I did this type of beading, so I had to get in the zone again. I began with a basic outline stitch, then moved on to some simple chain stitch, fly stitch, and ended with feather stitch.

I'm working on the 3 blocks simultaneously so that each has the same type/color of beads as I'll invariably run out and have to buy more and they may not match the ones that I've already used. I enjoy stitching at night, so this part of the project shouldn't take too long. There's also another UFO day next week. I think these circles will set off the black and white wall hanging I pieced. My next step is to find a backing fabric so I can quilt the piece before appliqueing on these circles. I'd like to find a black and white print with some red in it.

Friday, July 25, 2014

Constructing Circular Crazy Quilt "Blocks"


Is it correct to call something circular a block? Whether it is or isn't, I've just finished constructing 3 of them, a large, medium, and small, all done in fancy red fabrics. I could have constructed 3 blocks, then used templates to cut them into circles, but since I was making them without any patterns, I wanted to see what would develop. As I progressed from large to small, there were definitely challenges which I met using  some curved patches and some appliqued ones.

I began by going through my stash of red-hued fancy fabric, a somewhat limited selection, and choosing fabrics which worked well together. Most of the fabrics were solid, so I had to rely on texture to add interest to each block. I drew 3 circles of different sizes onto a piece of muslin then cut them apart leaving a generous margin around each. I then cut my first patch, a 5-sided one. I always begin with a 5-sided patch as it prevents the finished block from looking "strippy." Working clockwise around that first patch, I used the flip and sew method to completely cover my drawn line. When I was done, I pinned the template (made from freezer paper) to the patch and sewed around it so I had a true circle. I proceeded in like fashion with the other two circles.

I plan to use only red beads to embellish the seams of these circles, though I will use a selection of various sizes and types of beads (though plans have been known to change). Right now my plan is to use just the beads for embellishment. These circles will be finished using the interfacing method of applique to attach them to the black and white wall hanging I posted about last week (see here).

Monday, July 21, 2014

I'm on a Mission


Yes, I'm on a mission--a mission to finish up my UFO's and simultaneously clean up my studio. A year or so ago an art quilter named Terry Kramzar did a program at one of my quilt guilds. While I didn't take her workshop, a good friend did and shared the details of how to create what I consider a canvas for playing with fabric or embellishments. I created the piece above which hangs in my beach condo. The batiks and the soft pastels mirror the view of the Gulf of Mexico and is suited for its new home.

I then started another piece using the same technique, this time using some fancy fabrics from my crazy quilting stash. I inadvertently made only 8 squares instead of 9, so it joined the ranks of my UFO's.  I'm sure I had an idea at the time, but I didn't make any sketches and now I'm not quite sure what to do with it now that I've made the final square and pieced it together.


I'm a fairly decent detective (I had to be to stay one step ahead of my students) and the fact that I'd stored it with a book on motifs leads me to think I intended to do another beaded applique. I'll leave it up on my design wall to see if anything occurs to me. I'm open to suggestions...

Sunday, July 20, 2014

You CAN Teach an Old Dog New Tricks


I've been crazy quilting for about 5 years now, being mostly self-taught. There are some wonderful books on crazy quilting which have lead me to books on beading, silk ribbon embroidery, embroidery, stumpwork--well, the list goes on. I've taken several online classes, a few classes at quilt shows, and I've even taught my own workshop on crazy quilting. I continue to get inspiration from some wonderful blogs, one of which is Shawkl.  I usually embellish my seams "free hand," meaning I don't use templates or draw guidelines. I'm pleased with the look, but I have a set of plastic templates I bought from Sharon Boggons as well as a book of templates that I bought from Kathy Shaw, so when I read on her blog that she was offering a free online class, I joined. Although the class is geared toward beginning crazy quilters, Kathy graciously welcomes any skill level. Why am I taking the class? I want to experience embellishing using a hoop and using the aforementioned templates. I'm quite certain I will learn a great deal more from Kathy, whose work is beautiful.

I truly believe that no matter how knowledgeable you are in any area, you can always learn more. I've been fortunate to meet many talented fiber artists in the 2 guilds I belong to as well as the online groups I participate in. I've learned from so many and hope I, in turn, have helped others by sharing what I know .

In this class, we will all be making the same block and embellishing it the same way. I understand why Kathy is doing this. We were given the pattern to use to piece our block and directed to use neutral fabrics in constructing it. I'm anxious for the next step.

Saturday, July 19, 2014

I'm So Dizzy


I decided to create a second blog since much more of my time these days is spent quilting rather than cooking. While I still post occasionally to The Food of Love, it's more to archive my favorite recipes for my personal use.

My intention here is to chronicle my passion for the fiber arts, most especially quilting. I began hand piecing and hand quilting in the late seventies. Then, it was a way to alleviate stress. I enjoyed making baby quilts for family and friends, but didn't have a great deal of time to devote to this hobby since I was working full time, attending graduate school, and attempting to get ahead in my career.

In 2004, I retired after 35 years in education and began my odyssey in machine quilting. Since then I've spent thousands of hours taking classes, learning new techniques, attending quilt shows, and amassing an alarming collection of fabric, threads, sewing "tools," and embellishments. I've also returned to "hand work" in the form of crazy quilting, though I continue to create "sane" quilts.

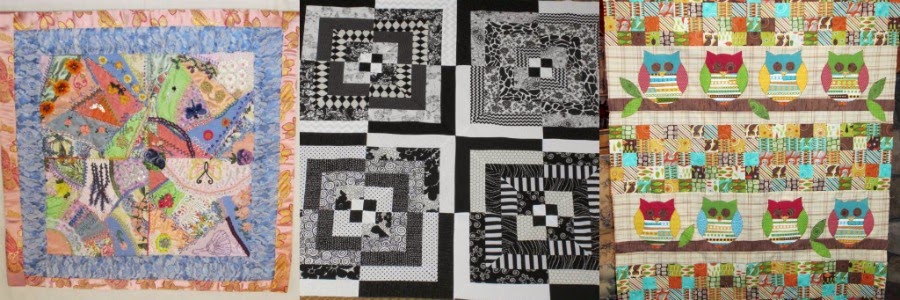
This piece, which measures 48" X 48" will become a wall hanging. I began it in a workshop given by Ed Bostick on Tuesday and finished it this morning. After I quilt it--I need lots of practice free motion quilting--I intend to applique on a small, red, spherical crazy block.

Stay tuned.